Identifying Minerals: Characterizing minerals' physical properties
Listen to this reading
Did you know that even though thousands of minerals have been named, only about a dozen are common in the Earth’s crust? Sophisticated laboratory equipment exists for determining the exact chemical composition of minerals, yet sometimes the most essential tools in geology are a magnifying lens and a penknife. Using just these tools, scientists can identify about 90% of what they encounter in the field.
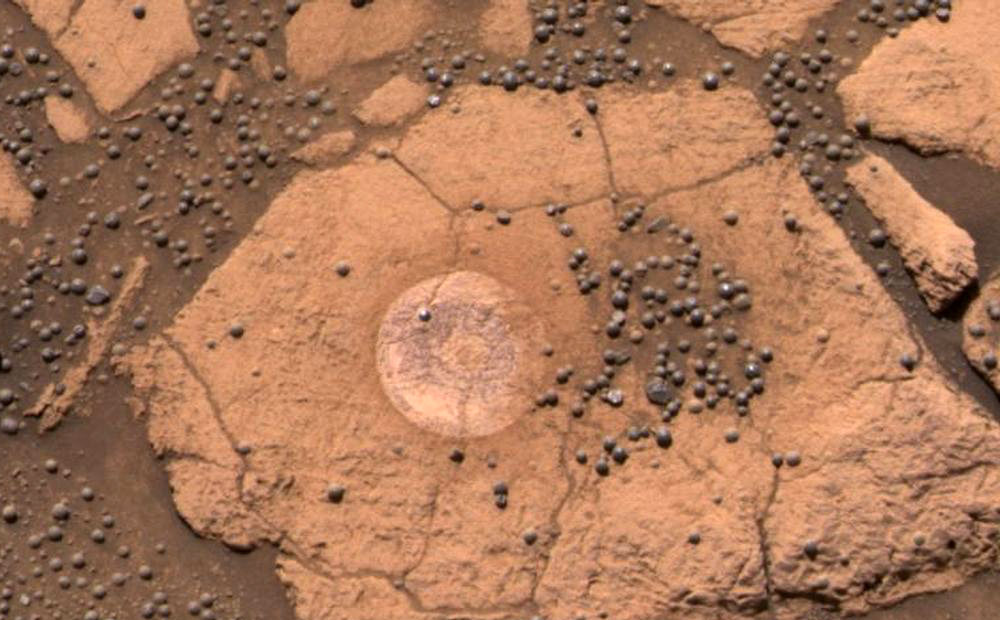
Geologists have recently determined that the minerals goethite and hematite exist in abundance on Mars, sure signs of the presence of water (see Figure 1 for a picture). None of those geologists have been to Mars, of course, but the unmanned rovers Spirit and Opportunity have. These rovers are equipped with three mass spectrometers, each of which is capable of determining the chemical composition of a solid with a high degree of accuracy. With such a precise chemical analysis in hand, geologists on Earth had no problem identifying the minerals.
A mineral is defined in part by a specific chemical composition. In theory, therefore, it is always easy to identify a mineral, if you can determine the chemical composition with a mass spectrometer like the Mars rovers. In reality, however, even if you are looking at rocks on Earth, determining the exact chemical composition of a substance involves significant time preparing the sample and sophisticated laboratory equipment (and often significant money). Luckily, it is usually unnecessary to go to such lengths, because there are much easier ways that require little more than a magnifying lens and a penknife.
Identifying minerals by physical properties
The most common minerals in Earth's crust can often be identified in the field using basic physical properties such as color, shape, and hardness. The context of a mineral is important, too – some minerals can form under the same conditions, so you are likely to find them in the same rock, while others form under very different conditions and will never occur in the same rock. For this reason, context (the other surrounding minerals and type of rock) can often be used to rule out minerals that have similar color, for example. Although there are many thousands of named minerals, only a dozen or so are common in Earth's crust. Testing a few physical properties therefore means that you can identify about 90% of what you are likely to encounter in the field.
Because the physical properties of a mineral are determined by its chemical composition and internal atomic structure, they can be used diagnostically, the way a runny nose and sore throat can be used to diagnose a cold. There are many physical properties of minerals that are testable with varying degrees of ease, including color, crystal form (or shape), hardness, luster (or shine), density, and cleavage or fracture (how the mineral breaks). In addition, many minerals have unique properties, such as radioactivity, fluorescence under black light, or reaction to acid. In most cases, it is necessary to observe a few properties to identify a mineral; to extend the medical analogy even further, a runny nose is a symptom of a cold virus, allergies, or a sinus infection among other things, so we have to use other symptoms to diagnose the problem – a headache, fever, watery eyes, and so on.
Comprehension Checkpoint
Color
The most obvious property of a mineral, its color, is unfortunately also the least diagnostic. In the same way that a headache is a symptom for a whole host of problems from the flu to a head injury, many minerals share the same color. For example, several minerals are green in color – olivine, epidote, and actinolite, just to name a few. On the other extreme, one mineral can take on several different colors if there are impurities in the chemical composition, such as quartz, which can be clear, smoky, pink, purple, or yellow.
Part of the reason that the color of minerals is not uniquely diagnostic is that there are several components of the crystal compositions and structure that can produce color. The presence of some elements, such as iron, always results in a colored mineral, but iron can produce a wide variety of colors depending on its state of oxidation – black, red, or green, most commonly. Some minerals have color-producing elements in their crystal structure, like olivine (Fe2SiO4), while others incorporate them as impurities, like quartz (SiO2). All of this variability makes it difficult to solely use color to identify a mineral. However, in combination with other properties such as crystal form, color can help narrow the possibilities. As an example, hornblende, biotite, and muscovite are all very commonly found in rocks such as granite. Hornblende and biotite are both black, but they can be easily distinguished by their crystal form because biotite occurs in sheets, while hornblende forms stout prisms (Figure 2). Muscovite and biotite both form in sheets, but they are different colors – muscovite is colorless, in fact.
Comprehension Checkpoint
Crystal form
The external shape of a mineral crystal (or its crystal form) is determined largely by its internal atomic structure, which means that this property can be highly diagnostic. Specifically, the form of a crystal is defined by the angular relationships between crystal faces (recall Steno's Law of Interfacial Angles as discussed in our Minerals I module). Some minerals, like halite (NaCl, or salt) and pyrite (FeS) have a cubic form (see Figure 3, left); others like tourmaline (see Figure 3, middle) are prismatic. Some minerals, like azurite and malachite, which are both copper ores, don't form regular crystals, and are amorphous (Figure 3).

Unfortunately, we don't always get to see the crystal form. We see perfect crystals only when they have had a chance to grow into a cavity, such as in a geode. When crystals grow in the context of cooling magma, however, they are competing for space with all of the other crystals that are trying to grow and they tend to fill in whatever space they can. The shape of the crystal can vary quite a bit depending on the amount of space available, but the angle between the crystal faces will always be the same.
Comprehension Checkpoint
Hardness
The hardness of a mineral can be tested in several ways. Most commonly, minerals are compared to an object of known hardness using a scratch test – if a nail, for example, can scratch a crystal, than the nail is harder than that mineral. In the early 1800s, Friedrich Mohs, an Austrian mineralogist, developed a relative hardness scale based on the scratch test. He assigned integer numbers to each mineral, where 1 is the softest and 10 is the hardest. This scale is shown in Figure 4.

The scale is not linear (corundum is actually 4 times as hard as quartz), and other methods have now provided more rigorous measurements of hardness. Despite the lack of precision in the Mohs scale, it remains useful because it is simple, easy to remember, and easy to test. The steel of a pocketknife (a common tool for geologists to carry in the field) falls almost right in the middle, so it is easy to distinguish the upper half from the lower half. For example, quartz and calcite can look exactly the same – both are colorless and translucent, and occur in a wide variety of rocks. But a simple scratch test can tell them apart; calcite will be scratched by a pocketknife or rock hammer and quartz will not. Gypsum can also look a lot like calcite, but is so soft that it can be scratched by a fingernail.
Variations in hardness make minerals useful for different purposes. The softness of calcite makes it a popular material for sculpture (marble is made up entirely of calcite), whereas the hardness of diamond means that it is used as an abrasive to polish rock.
Comprehension Checkpoint
Luster
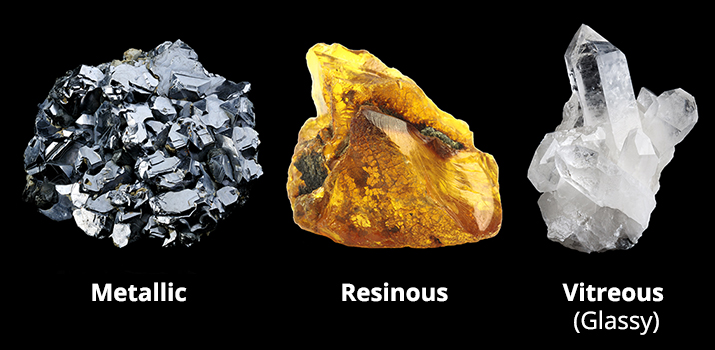
The luster of a mineral is the way that it reflects light. This may seem like a difficult distinction to make, but picture the difference between the way light reflects off a glass window and the way it reflects off of a shiny chrome car bumper. A mineral that reflects light the way glass does has a vitreous (or glassy) luster; a mineral that reflects light like chrome has a metallic luster. There are a variety of additional possibilities for luster, including pearly, waxy, and resinous (see pictures in Figure 5). Minerals that are as brilliantly reflective as diamond have an adamantine luster. With a little practice, luster is as easily recognized as color and can be quite distinctive, particularly for minerals that occur in multiple colors like quartz.
Density
The density of minerals varies widely from about 1.01 g/cm3 to about 17.5 g/cm3. The density of water is 1 g/cm3, pure iron has a density of 7.6 g/cm3, pure gold, 17.65 g/cm3. Minerals, therefore, occupy the range of densities between water and pure gold. Measuring the density of a specific mineral requires time-consuming techniques, and most geologists have developed a more intuitive sense for what is "normal" density, what is unusually heavy for its size, and what is unusually light. By "hefting" a rock, experienced geologists can usually guess if the rock is made up of minerals that contain iron or lead, for example, because it feels heavier than an average rock of the same size (see our Density module for more information).
Cleavage and fracture
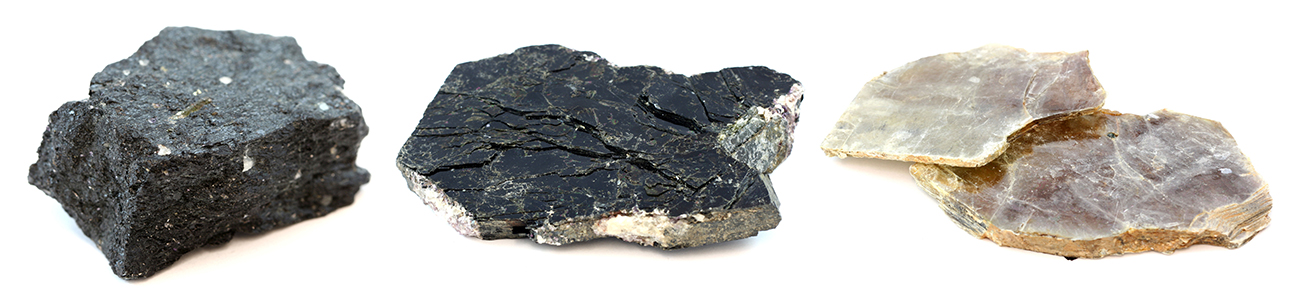
Most minerals contain inherent weaknesses within their atomic structures, a plane along which the bond strength is lower than the surrounding bonds. When hit with a hammer or otherwise broken, a mineral will tend to break along that plane of pre-existing weakness. This type of breakage is called cleavage, and the quality of the cleavage varies with the strength of the bonds. Biotite, for example, has layers of extremely weak hydrogen bonds that break very easily, thus biotite breaks along flat planes and is considered to have perfect cleavage (see Figure 6). Other minerals cleave along planar surfaces of varying roughness – these are considered to have good to poor cleavage.
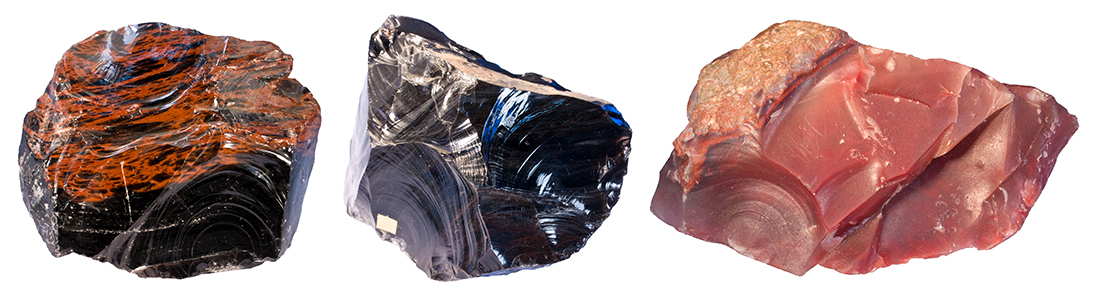
Some minerals don't have any planes of weakness in their atomic structure. These minerals don't have any cleavage, and instead they fracture. Quartz fractures in a distinctive fashion, called conchoidal, which produces a concave surface with a series of arcuate ribs similar to the way that glass fractures (see Figure 6). For quartz, in fact, this lack of cleavage is a distinguishing property.
Comprehension Checkpoint
Mineral classification systems
Physical properties provided the main basis for classification of minerals from the Middle Ages through the mid-1800s. Minerals were grouped according to characteristics such as hardness, so that diamond and corundum would be in the same class of minerals. As the ability to determine the chemical composition of minerals developed, so did a new classification system. Many scientists contributed to the discovery of mineral chemical formulas, but James Dwight Dana, a mineralogist at Yale University from 1850 to 1892 (see Biography link in the Resources section), developed a classification system for minerals based on chemical composition that has survived to the present day. He grouped minerals according to their anions, such as oxides (compounds with O2-), silicates (compounds with (SiO4)4-), and sulfates (compounds with (SO4)2-). A chemical classification system meant that minerals that were grouped together theoretically also tended to appear with each other in rocks since they tended to develop under similar geochemical conditions.
Physical properties still provide the main means for identification of minerals, however, though they are no longer used to group minerals (from the example above, corundum is an oxide while diamond is a pure element, so by Dana's system, they are in separate groups). A composition-based grouping highlights some common mineral associations that allow geologists to make educated guesses about which minerals are present in a rock, even with only a quick glance. By far, the most common minerals are the silicates, which make up 90% of Earth's crust. Of the many hundreds of named silicate minerals, only about eight are common, one of which is quartz. The uncommon minerals are critical, however, as they include economically important ones such as galena, which is the primary ore for lead, and apatite, a phosphate mined for phosphoric acid that is added to fertilizers. The discovery of new ore deposits depends on the ability of geologists to identify what they see in the field and recognize unusual mineral occurrences that should be explored in more detail in the laboratory. A hand lens, a pocketknife, and a lot of practice still provide the easiest and cheapest methods of identifying minerals.
Table of Contents
Activate glossary term highlighting to easily identify key terms within the module. Once highlighted, you can click on these terms to view their definitions.
Activate NGSS annotations to easily identify NGSS standards within the module. Once highlighted, you can click on them to view these standards.